Chris, over at Just a Girl, was hosting an I Can Make That party on her blog this past Monday. I thought I'd make a submission and be fashionably late. Hey, I'm new to craft blogging...that's my excuse and I'm sticking to it. Check out her site for TONS of cute ideas and gifts that you can make also!
{First, a disclaimer: several of my friends will probably be receiving these as gifts this year, so please act surprised when you get one and pretend that you never saw this post!}
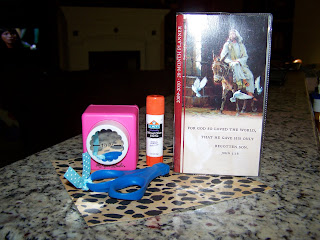 {Small calendar in clear sleeve, piece of scrapbook paper, scissors, glue stick, paper punch and not pictured: ribbon, glue, stamp pad and stamps}
 What do you think? I certainly think it's much cuter now than it was when I originally purchased it. Oh, and did I mention that the total cost for this project was $1.00? I found the calendar at DollarTree and everything else was stuff I already had and you probably do too. If you make one, please comment and let me know. :)
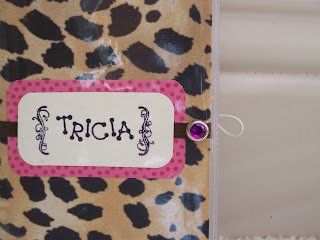
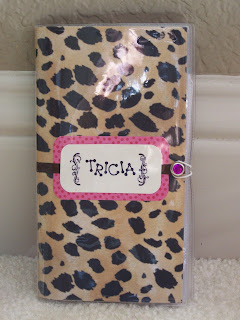
{I've made several more of these since I first posted this but I won't show you pics yet because they're going to be gifts. Anyways, I have gone back and added a cute rhinestone brad to the front cover (punched a whole through the plastic cover, ribbon, paper and all) and added a piece of elastic that is held in place with an eyelet on the back) I found the idea for this over here. Now I like my calendar even more!}
{First, a disclaimer: several of my friends will probably be receiving these as gifts this year, so please act surprised when you get one and pretend that you never saw this post!}
Two girlfriends from my MOPS group came over this morning for a few hours to help get our next craft prepped and make some examples for our next meeting. We spent the morning making cute picture frames {I'll post that craft next week after our meeting} and I decided after they left that I'd take advantage of having half my supplies sprawled out all over the kitchen and make some more stuff instead of cleaning. :)
Here is my submission to the I Can Make That {seriously, anyone can do this...cheap, quick and something everyone really uses. This would be great as a gift for a neighbor, stocking stuffer, mail man, friend, etc... Scroll all the way down to see just how cheap thrifty this project is}
So, up first was a quick transformation of a purse size calendar. I started with all of this:
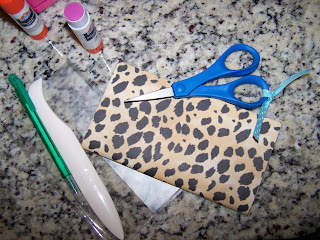
{Small calendar in clear sleeve, piece of scrapbook paper, scissors, glue stick, paper punch and not pictured: ribbon, glue, stamp pad and stamps}1. Remove the calendar from it's plastic sleeve and trace it on the backside of the scrapbook paper.
2. Apply glue stick to the backside of the paper and adhere to the cover of the calendar.

Your calendar will now look something like this.
(I used a bone folder...that white thing next to the green mechanical pencil...to smooth out any air bubbles and make sure the paper is adhered. You can also use your finger or save those fake credit cards that come in your junk mail and use them to smooth your paper)
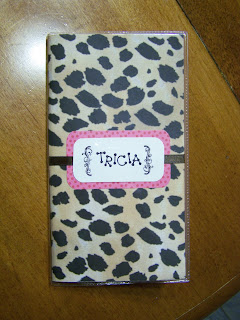
Next, I just embellished it a little. I didn't want to do too much with this wild pattern so I just stamped my name on a piece of paper, framed it with a scrap and glued down some ribbon. I put it back in the plastic sleeve and I was done! {If yours doesn't have a plastic sleeve, you may want to apply a coat or two of Mod Podge to keep it from getting torn up and ruined in your purse.}
Click on the picture for a larger view and you'll see that it's in the plastic sleeve.
 What do you think? I certainly think it's much cuter now than it was when I originally purchased it. Oh, and did I mention that the total cost for this project was $1.00? I found the calendar at DollarTree and everything else was stuff I already had and you probably do too. If you make one, please comment and let me know. :)
{I've made several more of these since I first posted this but I won't show you pics yet because they're going to be gifts. Anyways, I have gone back and added a cute rhinestone brad to the front cover (punched a whole through the plastic cover, ribbon, paper and all) and added a piece of elastic that is held in place with an eyelet on the back) I found the idea for this over here. Now I like my calendar even more!}