 Wishing you and yours a very Merry Christmas! Things have been crazy the last week or so as we finished up all our Christmas shopping, baking, visits with friends and family, crafts, shopping, wrapping, etc. I have been working away but something had to give (blogging) or I was going to turn into one mean momma and that's NOT what I wanted my kids to remember about Christmas! I have barely been at the computer the last week and have so many blogs to catch up on! Oh well, they'll all still be there after the first of the year, right? We're heading out of town to visit the in-laws in the morning so I'll be back in full force after the first of the year. Merry Christmas & a Happy New Year!
Thursday, December 25, 2008
Merry Christmas!
 Wishing you and yours a very Merry Christmas! Things have been crazy the last week or so as we finished up all our Christmas shopping, baking, visits with friends and family, crafts, shopping, wrapping, etc. I have been working away but something had to give (blogging) or I was going to turn into one mean momma and that's NOT what I wanted my kids to remember about Christmas! I have barely been at the computer the last week and have so many blogs to catch up on! Oh well, they'll all still be there after the first of the year, right? We're heading out of town to visit the in-laws in the morning so I'll be back in full force after the first of the year. Merry Christmas & a Happy New Year!
Wednesday, December 17, 2008
Another awesome giveaway....
So, I found another really fun blog today and they're doing some cool giveaways right now. Go check out petit elefant and see what all is being given away in the 12 days of Christmas Giveaway Extravaganza! I would love to win this giveaway because the site You Can Make This is seriously addicting! I've ordered e-books through them before and I've never been disappointed. There are LOTS of cool projects and there is even a "FREE" section. Who doesn't like FREE?
petit elefant has a ton of fun goodies (microwave, Smartshopper, Land's End giveaway, kids personalized books and tons more) in the giveaway. Go check them out now!
Saturday, December 13, 2008
Chocolate Covered Marshmallow Snowmen {Super Yummy!}


 My daughter {20 months old} is already hamming it up for the camera while Connor admires his first snowman.
  A closer look at his first masterpiece. :)
  Here she is with a completely fake smile...but proud of the fact that she was able to steal a bottle of sprinkles away from her brother! As you can see, she was also able to sneak a few pieces of candy and sprinkles and relished every bite.
  Finally, she decided to pitch in and help decorate a few of the snowmen instead of just eating them. Can you tell which ones she helped with? Connor wasn't entirely happy with her "help".
  The snowmen were really fun to make and I'm sure we'll make them again. I know Connor's friends are really going to enjoy eating these, too. I think they'd also be really cute to use as a stirrer in a cup of hot cocoa. It would add a little white chocolate and tons of marshmallow to the cup...great for someone with a sweet tooth {like me!}
 Okay, last pic of the night, I promise! These were my final creation of the evening. I started dipping the mini marshmallows in the white chocolate and then tossing them in a bowl of coconut shavings...YUMMY! They look like little snowballs and taste DE-LISH! Give them a try and you won't be sorry {that is, unless you are one of those people that don't like coconut} :)
Thursday, December 11, 2008
Too many crafts...not enough time!
Button Snowman Onesie
This was just a basic red turtleneck onesie that I embellished. I know I've seen a post or two with these along with some pictures on flickr...just can't remember where I found them to give the original person credit. Anyways, I have a bunch of vintage buttons that my great grandmother used to collect, so I used a few for this. {Forgive the terrible pictures...my hubby just got a digital SLR yesterday but we still need some lenses and need to learn how to use it. I hope my images will improve in quality in the near future.} In the mean time, you get to look at a yellow snowman. The buttons are actually a beautiful ivory color with a pearly sheen to them. I think one of them is a mother of pearl button. I'm not thrilled with how the little faux scarf turned out so I'll probably fix it later but for now, this is what she'll wear. I think this would also be really cute on some tea towels.

Elastic Bookmarks
As I was getting ready to go to bed last night, I noticed Nikki had updated her blog. I love her blog, Whimsy love! She had posted some adorable elastic bookmarks. You can see the tutorial here {and while you're there, check out some of her other tutorials, lots of cute stuff} I realized I had everything I needed to make them and couldn't go to sleep until I'd made some myself. :) So, I spent 15 minutes hunting down my various elastics before I remembered I'd gotten it all out to add some closures to my pocket calendars {go check the post back out, I updated it a week or so ago and I like them even more now} Once I found everything, I had 5 bookmarks made in just a matter of a few minutes. I would have made 50, but I need to get some more elastic. If you can use a ruler, a pair of scissors and know how to tie a knot, then you can make this project! Here's what I made {and again, forgive the poor pics}
 I think these bookmarks would be adorable wrapped around a small gift instead of using a bow. Because they're elastic, they stay in place...no more losing your spot in your book because your 20 month old pulled out your bookmark again!
 Okay, I'm heading to Hobby Lobby for the third time this week! I need some more trim to make tassels. I'll show yall those soon.
Monday, December 8, 2008
Awesome Crafty Giveaway spotted...

Confessions of a Craft Addict is hosting this awesome giveaway! This is taken directly from her blog: "There’s a little bit of everything here: fabric, beads, Scrabble tiles, scrapbooking elements, ribbon, tulle, yarn, snaps, buttons, embroidery kits, patterns and books. Everything you need to be a craft addict or feed your existing crafty addiction. A couple of things are from my stash or pre-loved, while some things were purchased new just for you. I think it’s a pretty cool prize and I hope you will, too."
Head on over to her blog and check it out. One of the rules for entry is that you must leave her a comment about your favorite charity. Tell her the name of it, why you support it, what it does, whatever — give them a plug! All the rules are on her site.
I think I should win since my blog is titled {Craft Addict}...it's only fair, right? :)
Since we're at it, I'll tell yall about my favorite non-profit. Prestonwood Pregnancy To give you a little background, my oldest son was a crisis pregnancy for me (in the sense that I was a junior in college, not married and hadn't planned on starting my family under these circumstances...nor with the man whose child I was carrying) I was scared to death and found SO much support, love and reassurance from a crisis pregnancy center in my college town. I am forever grateful for the prayers, time and outpouring of support from them. So, when I moved to Dallas after my son was born (to finish school and be closer to family for the support that I needed) I began volunteering at a crisis pregnancy center here. After a year or two, I joined the staff full time and was blessed beyond measure during my time there. The awesome part of this is that God can take our mistakes and make them our message. I truly feel blessed to have been able to look young women in the eyes and tell them I could understand, I had been there...and it will be okay if you let HIM take control. What's really awesome is that most crisis pregnancy centers are not just focused on the life of the unborn child but also the eternal life of the mother and father involved in that pregnancy. The gospel message is almost always shared and you would be amazed at how many men and women come to know the Lord through their time as a client! I am no longer volunteering or working there b/c God has blessed me with an incredible husband (who adopted my son, our son) and we have since welcomed another child into our lives. I have been given the awesome responsibility and blessing of being a stay at home mother...something I NEVER thought possible, nor dreamed of 7 years ago when I found out I was going to be a mother. We still are in close contact with Prestonwood Pregnancy and love to help support them financially when we can. I know when the kids are both back in school, I'll be back up there volunteering again!
Friday, December 5, 2008
A few of my favorite things & a thrifty white elephant gift
Head on over here if you want to join the party or see other lists of favorite things.
Topping my list of favorites right now are the following:
1. Hazelnut Hot Cocoa - Archer Farms (Target brand) has a great mix if you are like me and don't want to fork out tons of $$$ to Starbucks. There are tons of other flavors, but I'm addicted to the hazelnut...topped with a little whipped cream and I'm good to go.
2. Bob's Peppermint Pie - We grew up devouring Bob's Soft Peppermint sticks. My brother and I would always twist and turn them in our mouths as we sucked on them to bring them to a fine point so we could poke each other with them :) Anyways, my mother and I were both watching Paula Deen on the Food Network the morning she aired this recipe. We have both made this multiple times now and it's so yummy...unexpected...but really good. {Come on, it's from Paula Deen, that woman makes awesome stuff!} If you have trouble finding the peppermint sticks, Walmart usually has giant tubs of the soft peppermint "pillow" looking candies. They're individually wrapped, but well worth the effort for this recipe. My other tip is to crush the candies before you put them on the stove top to start melting. Trust me on this, it takes FOREVER if you don't!
3. We have my husband's office party tonight {this is the small departmental party with all the people we know. The big company party is next weekend}. You'll know why I threw that preface in there when you take a look at the picture. I made these for the white elephant gift exchange, per my husbands request. Yup, he asked me to make these... {love him!}

Hehehe...slippers made from maxi pads. I beautified {like that word?} them with some left over fake flowers from my stash and a rhinestone accent. Someone tonight will get to take them home. I just hope they don't need to use them for their original purpose b/c I hot glued them together in case the sticky strips didn't hold up. The funny thing about this gift is that I did make slippers out of maxi pads...when I was 4 and at my dad's new boss' house for dinner. It's one of the family stories that will never die -well, not if my family can help it at least.
4. My list could go on and on and on but I won't bore you to tears... oh wait, maybe I will!
5. My kids! I LOVE watching them take in all the magic of Christmas. Right now, my daughter is sitting in her high chair eating "yo yo's" {cheerios} and playing with a $9.99 plastic snow globe from CVS that plays 11 different music selections. She's captivated by that silly thing and I love watching her face light up each time she pushes that button. My son's prayers reflect that he's really coming to an understanding of Christ and the true meaning of Christmas-as opposed to just repeating things we've said or he's been taught-this is priceless to me!
What are your favorite things right now?
Thursday, December 4, 2008
My only Christmas decor right now...
Here is one little project I managed to get accomplished this week and I really like the way it turned out!
 I promise that is looks a lot prettier in person! {geez, you think I could at least take the picture so it was centered on the wall and not so weird looking with my iron piece there on the wall behind it..but this is what you get when I take a pic hanging from a ladder in my kitchen} I just wrapped an extra piece of garland around the chain on my light fixture and shaped it like a tree and then decorated with a little garland, ribbon and some gold glittery birds and assorted gold balls. Once I get all my Christmas ornaments out to decorate the tree, I plan on setting a few aside and hanging them from the metal scrolls on this fixture.
Well, I am going to go start decorating the tree since my baby girl is sleeping {YEAH!} and my son just left for school. I'll post pictures once I get everything up and decorated so I can participate in Thrify Decor Chick's Favorite Things party.
Sunday, November 30, 2008
Awesome Giveaway spotted...
Saturday, November 29, 2008
Conversation Pebbles
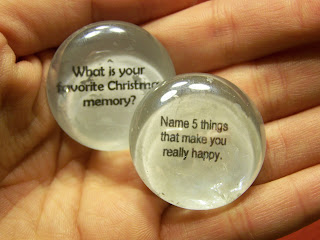 I saw this cute idea while watching HGTV over the weekend. {I think it was on a Decorating Cents holiday special, but don't hold me to that} Anyways, on one of the tables they were setting for the holidays, they placed the cheap little glass gems {vase fillers} around the centerpiece and also had some of the large ones mixed in with them. The host picked them up and revealed cute little conversation pebbles. I realized I had everything at home to make them and wouldn't have to get out on Black Friday to go get supplies!
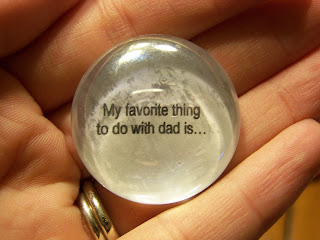
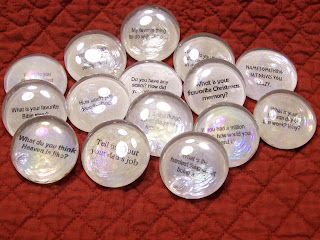 So these little guys were hard to photograph given the overhead light and their iridescent sheen, but you get the point, right?
Monday, November 24, 2008
Trash to Treasure {Jewelry Organizer}
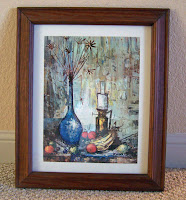 Well, maybe I don't have a place for the picture, but the frame will work for this project. I took off the backing and set the picture and glass aside. See, doesn't it look better already? This is one of my little helpers. Isn't she a cutie? :)
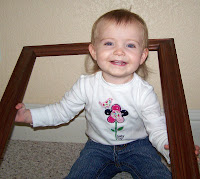
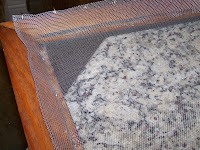 Then, I repositioned the saw tooth hanger so that my frame would hang horizontal instead of it's original vertical position. Here is what it looks like now:
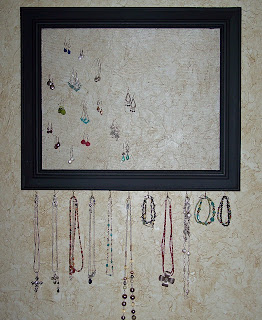 I haven't loaded all my jewelry on yet {but I couldn't wait to share it with you gals} because I realized I need to put another saw tooth hanger on it. With one hanger, the piece tends to move on the wall if the weight isn't even on both sides. It would probably be fine if I was only going to hang earrings on this...but I'll take it down and put a saw tooth hanger on the top right and left sides of the frame. Maybe I'll go do that right now since the baby is sleeping! Then I can finally get my jewelry out of all the little dishes on my dresser and vanity so I can see it all again! I've also got plans of making a smaller version of this jewelry holder to sit on my vanity for my earrings with a post and back. The one I just hung will really only work well with ear wires. How do you organize your jewelry?
 Wednesday, November 19, 2008
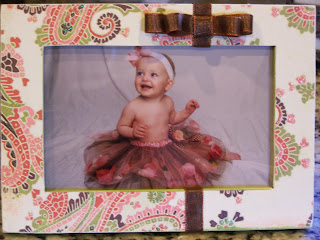
From "Blah" to "Oooo, Ahhh"
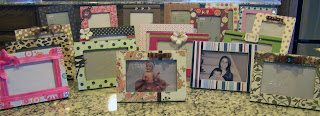 I received a lot of good feedback from the ladies today and it appeared that everyone was genuinely having a good time. That makes me happy! :) This is my first year as the creative activities coordinator and I've spent a lot of time trying to come up with projects that fit into our budget, our short time frame to complete the project and have them be practical or fun projects (ie: not something they're going to trash on their way out the door). It's been fun teaching some of the ladies new techniques and seeing that sense of accomplishment. I'm hoping to make some craft addicts out of this group!
 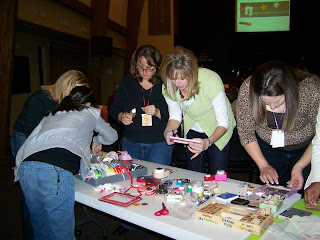 I think creative activities are such an important part of a MOPS group! It allows everyone time to get up and move around the room & meet new people, have discussions with other adults AND not be interrupted by your kiddos while doing so, it offers women the opportunity to learn new crafts, and you're able to start and finish a project that you may otherwise not have the time to do at home. I am really enjoying this opportunity as creative activities coordinator and it's forcing me to make time for creativity in my life. I realized a few months ago how little I was doing and how much I missed and needed that for myself. Besides, all the crafty blogs give me SOOO much inspiration and I hope to be able to do MANY of the fun projects I've found with our MOPS group.
Sunday, November 16, 2008
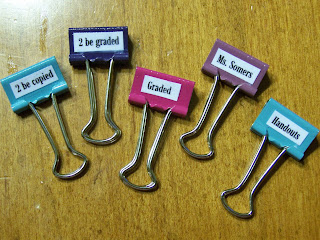
Custom {Organized} Binder Clips
So, here is a QUICK and easy project that will help you stay organized and would make a great addition to a teacher gift, too.
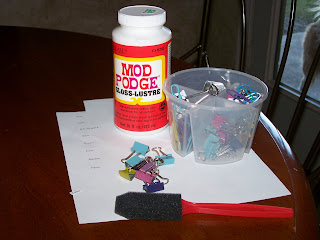 You'll need :
The binder clips come in varying sizes but the ones I used here have clips that measure 3/4" long and 1/2" high. I used a text font size 11 so that my text would fit on my clips once cut out. Adjust your font size to fit your clips.
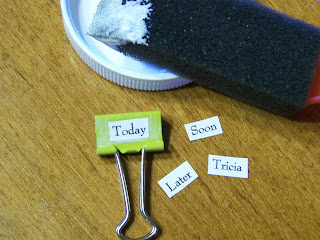 So, determine what sayings you want. I chose to do "today", "soon", "later", my name, my kids and husband's name all for sorting the papers, bills, field trip slips, etc. that seem to find their way to my kitchen counters. I also did a few sets with things like "2 be graded", "graded", "2 be copied", "handouts", and teachers names for teacher gifts. Type them up in a word program and print out. I then cut each word out and applied a thin layer of Mod Podge to one side of each clip. Next, I positioned each word in the middle of the clip while the Mod Podge was still wet. I let that coat dry and brushed another coat on top to seal and I was done.
Thursday, November 13, 2008
Creating a {Cute} purse size calendar...
{First, a disclaimer: several of my friends will probably be receiving these as gifts this year, so please act surprised when you get one and pretend that you never saw this post!}
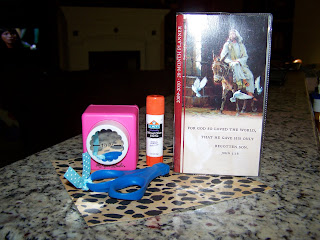 {Small calendar in clear sleeve, piece of scrapbook paper, scissors, glue stick, paper punch and not pictured: ribbon, glue, stamp pad and stamps}
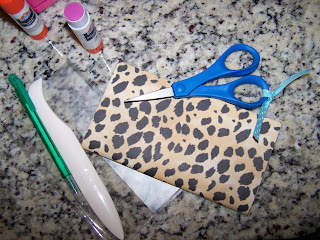
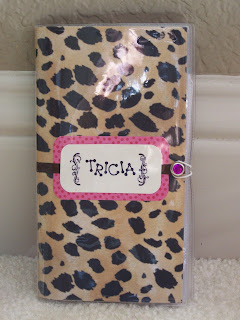
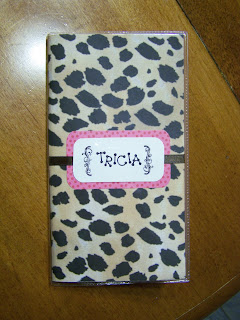 What do you think? I certainly think it's much cuter now than it was when I originally purchased it. Oh, and did I mention that the total cost for this project was $1.00? I found the calendar at DollarTree and everything else was stuff I already had and you probably do too. If you make one, please comment and let me know. :)
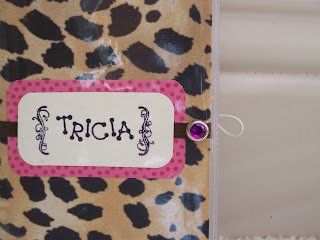
{I've made several more of these since I first posted this but I won't show you pics yet because they're going to be gifts. Anyways, I have gone back and added a cute rhinestone brad to the front cover (punched a whole through the plastic cover, ribbon, paper and all) and added a piece of elastic that is held in place with an eyelet on the back) I found the idea for this over here. Now I like my calendar even more!}
Tuesday, November 11, 2008
Sprucing up the fireplace with wood appliques
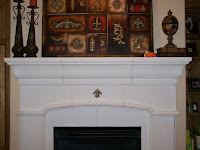 I was at Joann's buying some more fabric for a window mistreatment (from Nesting Place). I'll show you what I did with before and after pics soon. Anyways, while I was there, I decided to take a look at their wood appliques and I found both of these for $1.99 (and a 40% coupon).
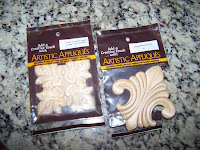
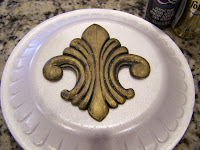 ad them looking like this:
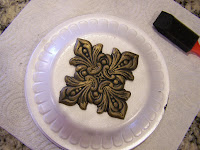
All I did was paint them black {graphite if we're being technical here} with a sponge brush and then used my blow dryer to speed up the drying time because I'm that impatient. :) Then I applied gold metallic paint with my finger so that the raised surfaces would become gold and the recessed areas would remain black. It took about 3 minutes to paint and dry these gals. Then, I applied them to the fireplace with scotch tape to see what they looked like and which one I wanted in the center. Now, I may go back and buy one more of the serrated squares {the one on the right in the picture above} and apply both of those to the fireplace also...hmmm....too many choices to make. Three might be getting too busy!?! Oh well, I'll still buy another one to see how I like it and then I can always use those appliques to spruce up something else.
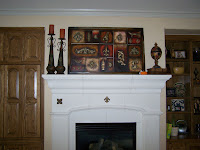
So what do you think? No appliques, just one {the fleur de lis or the square in the center} or the fleur de lis flanked by two square medallions (which I need to go buy another but you get the idea)? Leave a comment and let me know what you think! Oh, and ignore all the clutter on the built in bookcase...need to clear that out and reorganize it all!
Monday, November 10, 2008
Tip Junkie Shop-a-thon and 12 days of Junkie Giveaways
Tip Junkie is one of my favorite blogs. Laurie is hosting a Mom-preneur shop-a-thon and a 12 days of Junkie GIVEAWAY that starts tomorrow (Tuesday). Go on over to her site Tip Junkie and check it out! I find SO many cute ideas from her blog! I can't wait to see what she gives away this time. {Hoping I'll win something this time!}
Friday, November 7, 2008
Embellished Notebooks
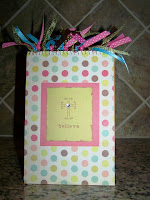 Anyways, you could use this idea to alter any spiral notebook but I really like the steno books with the spiral at the top. (Think of all the not-so-cute notebooks you can find for less than a dollar...oh, the possibilities!) You simply cover the notebook with scrapbook papers- including the spiral. I just made small cuts in the paper next to each spiral in order to completely cover the front and pressed the paper down between each spiral and glued. Because we're limited on time at our meetings, we just used a glue stick but when I make these at home, I use Mod Podge to adhere the paper to the notebooks and to seal it. Then you embellish with stamps, rhinestones, buttons, brads, stickers, etc. and then cut assorted ribbons that match your papers and knot onto each spiral. It's a quick and easy project and it seemed to go over well with the ladies in my MOPS group.
I had taken this picture before I decided to start a craft blog. In the future, I'll take more pics so you can see the progress and steps to completion. :) Now I'm off to see the dentist and get a new camera battery. Have a great weekend!
Wednesday, November 5, 2008
My new craft blog
I've got a growing list of handmade gifts I want to make this year. I intend to post links to tutorials but probably won't post my pics of finished products until after Christmas (that is, if I get around to actually making all the gifts). I hope that since I'm thinking about it now, I'll actually get a few gifts made instead of waiting until the week before Christmas to get started. :)
I'll post some links soon but now I'm off to spruce up this blog with a cool background and a list of all my favorite blogs I


