
 I saw this cute idea while watching HGTV over the weekend. {I think it was on a Decorating Cents holiday special, but don't hold me to that} Anyways, on one of the tables they were setting for the holidays, they placed the cheap little glass gems {vase fillers} around the centerpiece and also had some of the large ones mixed in with them. The host picked them up and revealed cute little conversation pebbles. I realized I had everything at home to make them and wouldn't have to get out on Black Friday to go get supplies!
They aren't the cutest things, but they really do help spark conversations at the table. I'm sure you could make them cute by using fun papers but I didn't want to limit them to one table scape and figured in this case, simple was better. I plan on bringing them out when we have company and just sprinkling them on the table. Since I still have a little one who likes to put things in her mouth, I won't use the small gems to decorate with. Anyways, I checked at Hobby Lobby while I was out on Saturday and you can get a 2 lb. bag of these large gems for $2.77 so this is a very inexpensive craft. By the way, the ones I used have that iridescent stuff on them but they looked and worked just fine. You can find "perfect large round gems" on ebay and etsy...but they're a lot more expensive and I think these irregular, iridescent ones work just fine for this.
All I did was type up a list of conversation starters that were appropriate for my kiddos and family. You can see in a few examples that I used questions like:
"My favorite thing to do with dad is...", " What do you think Heaven is like?", "What would you do if you were invisible for a day?", "What is your least favorite chore? Why?", "What has been the best day of your life so far?", etc.
I printed them out in size 8 & 9 fonts and made sure that my questions would fit under my pebbles without being cut off. Then, I just traced, cut {a large circle punch would have been great for this...adding that to my Christmas list now} and mod podged the circles to the back side of the stones. I pushed down to get rid of any air bubbles and then topped the back side off with two coats of mod podge to seal them.
My son picked these up at lunch today {because I was lazy and had left at least half a dozen projects I was working on on the kitchen table} and wanted to use them. My husband and I enjoyed listening to our son list 3 things he loved about his sister, explain to us what he thinks dad does at work, tell us his favorite joke and we got in on the fun too. It made for a very pleasant lunch and I think I'll make some more of these conversation pebbles and bring them out for no reason at all instead of waiting for a special occasion. :)
 So these little guys were hard to photograph given the overhead light and their iridescent sheen, but you get the point, right?
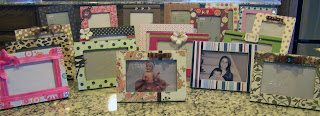 I received a lot of good feedback from the ladies today and it appeared that everyone was genuinely having a good time. That makes me happy! :) This is my first year as the creative activities coordinator and I've spent a lot of time trying to come up with projects that fit into our budget, our short time frame to complete the project and have them be practical or fun projects (ie: not something they're going to trash on their way out the door). It's been fun teaching some of the ladies new techniques and seeing that sense of accomplishment. I'm hoping to make some craft addicts out of this group!
 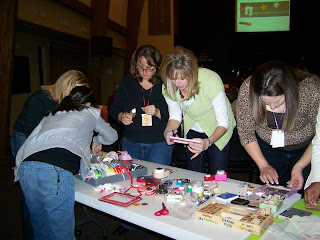 I think creative activities are such an important part of a MOPS group! It allows everyone time to get up and move around the room & meet new people, have discussions with other adults AND not be interrupted by your kiddos while doing so, it offers women the opportunity to learn new crafts, and you're able to start and finish a project that you may otherwise not have the time to do at home. I am really enjoying this opportunity as creative activities coordinator and it's forcing me to make time for creativity in my life. I realized a few months ago how little I was doing and how much I missed and needed that for myself. Besides, all the crafty blogs give me SOOO much inspiration and I hope to be able to do MANY of the fun projects I've found with our MOPS group.

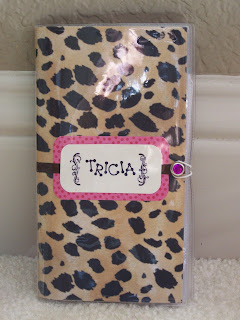
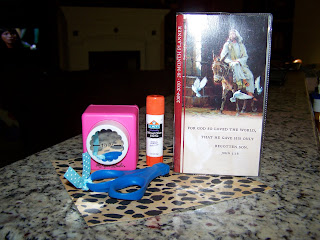 {Small calendar in clear sleeve, piece of scrapbook paper, scissors, glue stick, paper punch and not pictured: ribbon, glue, stamp pad and stamps}

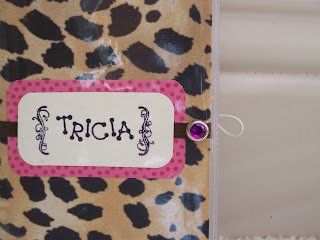
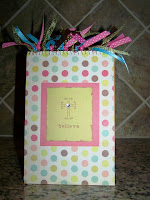 Anyways, you could use this idea to alter any spiral notebook but I really like the steno books with the spiral at the top. (Think of all the not-so-cute notebooks you can find for less than a dollar...oh, the possibilities!) You simply cover the notebook with scrapbook papers- including the spiral. I just made small cuts in the paper next to each spiral in order to completely cover the front and pressed the paper down between each spiral and glued. Because we're limited on time at our meetings, we just used a glue stick but when I make these at home, I use Mod Podge to adhere the paper to the notebooks and to seal it. Then you embellish with stamps, rhinestones, buttons, brads, stickers, etc. and then cut assorted ribbons that match your papers and knot onto each spiral. It's a quick and easy project and it seemed to go over well with the ladies in my MOPS group.


